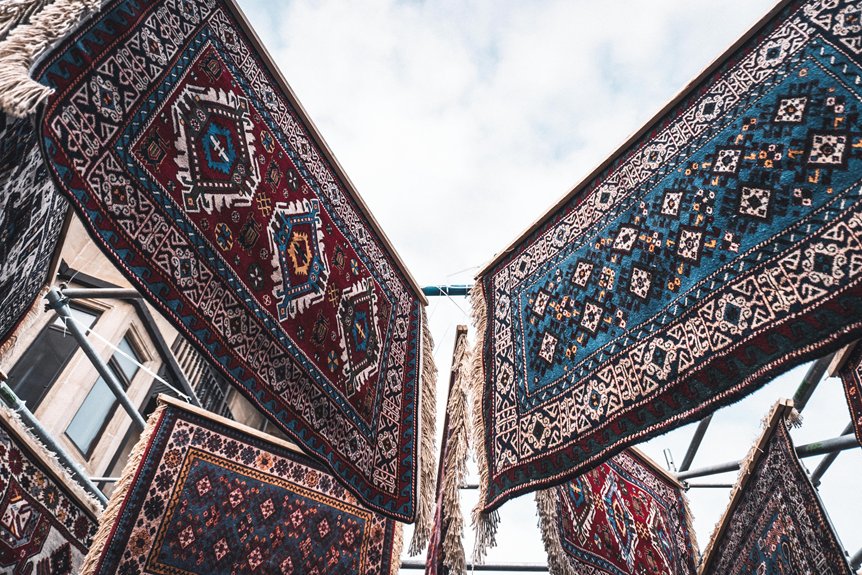
I’ve changed drab rugs into vibrant showstoppers using simple spray bottles and the right dye—and you can too. Start by confirming your rug’s dyeable (wool, cotton, nylon work great; polyester resists). Clean thoroughly, test on hidden spots, then spray evenly from edges inward with a 2:1 water-to-dye ratio.
For deeper saturation, submerge in a dye bath. Rake the fibers while wet, rinse completely, and use a rug pad to protect your floors. The results are remarkable—stick around to discover how each step produces excellent outcomes.
Confirm Your Rug Material Is Dyeable

Why does your rug’s material matter so much? I learned this the hard way after buying expensive dye for a polyester rug that wouldn’t take color. Not fun.
Here’s what I’ve discovered: dyeable rug materials like wool and nylon absorb dye beautifully. Cotton works great too. But polyester and acrylic? They’ll basically ignore your efforts. Viscon and semi-synthetic fibers *can* work, though results vary.
Before committing, I always do a dye test patch on a hidden corner. This simple step saves heartache and money.
Check your fiber compatibility by:
- Reading your rug’s tag
- Testing an inconspicuous area first
- Confirming the original color’s darker than your desired shade
This foundation matters. It’s worth the five minutes.
Prepare Your Space and Clean the Rug Thoroughly

Before you start dyeing, clear out all the furniture so the dye soaks in evenly across every inch, with no shadows from a chair leg affecting your results. Then comes the unglamorous part: vacuum thoroughly, spot-clean any stains, and maybe even call in the professionals for a deep clean because dirt and oils are basically dye blockers that’ll leave you with patchy, disappointing results. Once your rug’s completely dry, test that dye on a hidden corner first—discovering your “vibrant blue” turned murky green after you’ve dyed the whole thing is not ideal.
Clearing Furniture From Space
Getting your space ready is honestly the make-or-break moment for rug dyeing success. I’ve learned this the hard way—trust me, moving furniture first matters way more than you’d think.
Here’s why: when you’re applying dye to your carpet, you need access to *every inch*. That couch shoved in the corner? It’ll block your prep work and create uneven color patches that’ll haunt you later.
I clear out everything—chairs, tables, lamps, all of it. Creating an open room lets the dye absorb uniformly across your entire rug. Plus, you’ll avoid accidentally splashing dye on your favorite furniture.
This simple step improves your dyeing project. An empty space means better results and genuine peace of mind while you work.
Vacuuming And Spot Cleaning
Next, tackle visible grime with spot cleaning. Mix a mild solution and test it on a hidden area first—I learned this the hard way. Gently work the cleaner into problem spots without scrubbing aggressively. This rug preparation matters because oils and dirt block dye absorption.
Here’s the thing: you’re not just cleaning. You’re preparing the surface for color application. When your rug is pristine and dry, the dye will take well. This groundwork is important.
Testing Dye On Hidden Areas
You’re almost ready to dye your rug—but hold on.
Before you dye your entire rug, test dye compatibility on a hidden corner. This matters. Here’s why: what looks perfect in the bottle might behave differently on your actual rug.
Your test spot strategy:
Grab your spray bottle and apply dye to a discreet area—maybe underneath or behind furniture. This controlled approach lets you see exactly how your rug’s fibers absorb color. Wait and watch. Does the dye spread evenly? Does it shift unexpectedly?
Document everything. The actual color. How it settled. Any surprises. This becomes your roadmap for the full dyeing job ahead.
Think of it as your rug’s personality test. You’ll feel confident knowing exactly what’s coming next.
Test Your Dye on a Hidden Area First

Before you commit to dyeing your entire rug, I’m going to walk you through patch testing—because I’ve learned the hard way that skipping this step is like cooking without tasting first. You’ll pick a hidden spot (the underside, a back corner, somewhere nobody sees), apply your dye, and then wait for it to dry completely so you can see the actual color and check if the dye actually sticks to your specific fiber type. This test tells you everything: whether your wool or nylon will take the color evenly, if the shade matches what you wanted, and most importantly, whether you should keep going or call a professional.
Patch Testing Before Application
Why would you skip this step?
I learned the hard way. Before testing, I’d dive straight into dyeing, only to watch my favorite rug turn an unfortunate shade of purple-brown. That’s when I realized: a test patch saves everything.
I create my test patch in a hidden corner, using the *exact same dye mixture* I’m planning to use. This simple step reveals how your fibers actually respond—wool absorbs beautifully, nylon cooperates, but polyester? Often stubborn.
What I watch for:
- Dye absorption rates
- Color bleed into surrounding fibers
- Final color after complete drying
I document everything: the saturation level, how evenly it took, any unexpected shifts. When my test patch looks right, I proceed with confidence. When it doesn’t? I adjust my approach first. That’s learning from experience, not mistakes.
Identifying Suitable Hidden Spots
Where’s the safest corner of your rug to risk a dye mishap?
I always scout for spots nobody sees. Beneath furniture legs? Perfect. Under the bed or behind a couch? Even better. These hidden spot testing locations let you experiment without worry.
I grab a small spray bottle and apply dye to my chosen corner. This reveals *dye absorption* patterns before I commit to the whole rug. I’m checking three things: color intensity, evenness, and bleeding.
What I’m really testing:
- How your specific fibers respond
- Whether wool versus nylon affects results
- If polyester limits color uptake
I jot down everything—color shade, how quickly fibers drank it in, any seeping beyond my test area. This rug fiber compatibility check guides my next move: proceed confidently or call a professional. That small hidden test? It’s my insurance policy against regret.
Evaluating Dye Compatibility Results
Take a breath. You’re checking your test patch for three critical things:
- Color uptake – Does the dye actually grab onto your fibers, or does it wash right off?
- Even absorption – Is the shade consistent, or do you get blotchy, uneven spots?
- Bleeding concerns – Did colors seep into neighboring fibers or fade unevenly?
Here’s what I do: I document everything. Fiber type, original color, dye color, results. This becomes your personal guide.
If your test patch shows uneven absorption or color bleeding, stop. Don’t risk your whole rug. Professional dyeing exists for reasons.
But if that hidden spot looks good? You’re ready.
Mix Dye According to Package Instructions

Getting your dye mixture right is the foundation of the process—and it’s easier than you’d think. I learned this the hard way when I eyeballed my first batch and ended up with a patchy mess.
Here’s what I do now: I follow the package guidelines *exactly*. Those measurements matter—they’re not suggestions. I grab three spray bottles and mix using roughly a 2:1 water-to-dye ratio for each color separately. This prevents settling and keeps everything fresh.
The key? I check mixing times and agitation requirements on the label. Liquid dyes like Rit work best when applied immediately after mixing. Don’t let it sit around—it’ll dry out or separate.
Test your mixture on a hidden carpet spot first. You’ll feel confident knowing your dyeing results match what you imagined. That’s when the real work begins.
Spray Dye Evenly Across the Surface

I’ve learned that applying dye evenly is key to avoiding blotchy results. You’ll want to grab three spray bottles filled with your navy, royal blue, and green dye (mixed at about 2:1 water-to-dye ratio) and start from the outer edges, working inward in overlapping passes to create that ombre effect. Let each color layer soak for a couple hours in the sunshine before spraying the next one, which helps the dye settle evenly instead of creating those frustrating patches that make your rug look tie-dyed by accident.
Even Coverage Techniques
How do you get that beautiful, uniform color without those frustrating streaks and splotches? I’ve learned that mastering your dye application technique is important. Here’s what I do for even coverage:
- Fill three spray bottles with a 2:1 water-to-dye ratio—one for each color section
- Work in overlapping passes from outer edges toward the center, maintaining consistent distance
- Rake the dye deeper with a wide-tooth brush after spraying to lock in color
I always start with lighter colors first, testing hidden areas before committing. The key? Patience between passes. I let each layer dry completely before moving forward—rushing creates patches I regret later. Walking on wet sections ruins everything, so I stay disciplined. This dyeing technique improves my rugs noticeably, and honestly, it feels pretty satisfying when that uniform color finally appears.
Spray Bottle Application Method
The spray bottle method is where results happen—it’s my preferred technique for getting an even color across the entire rug. I fill three pre-mixed spray bottles with navy, royal blue, and green dye at a 2:1 water ratio. Here’s what I do: start with navy on the outer edges, then layer royal blue toward the center, finishing with green in the middle. This creates that gorgeous ombre effect.
The key? Take your time. A gentle spray prevents pooling and allows dye layering to happen smoothly. I let mine soak in sunshine for a couple hours—it’s a worthwhile step because the color deepens nicely. You’re building something with care here, and it shows.
Avoiding Streaks And Patches
Now here’s where patience really pays off. I’ve learned that this dyeing technique demands finesse over force. Here’s what I do to nail even moisture:
- Use multiple light passes with my spray bottle, overlapping slightly—like painting with restraint
- Work in small sections, keeping the surface moist but never pooled
- Rake the carpet back-and-forth after spraying to push dye deeper
Before committing to your whole room, I always do a test patch in a closet or hidden corner. Nylon and wool carpets absorb color differently, and I’d rather discover surprises early than regret them later.
The key? Maintain 6–12 inches distance while spraying and avoid over-wetting. It’s the difference between a quality result and frustrating patches.
Layer Colors for Ombre and Gradient Effects
Ever wonder why some dyed rugs look like a sunset melted right onto the fibers? That’s what happens when you layer colors for ombre and gradient effects. I’ve discovered that starting light and building toward darker shades creates that dreamy transition you’re after.
Ever wonder why some dyed rugs look like a sunset melted onto the fibers? That’s the magic of layered ombre and gradient effects.
Here’s my process:
The Layering Method
- Apply your lightest color first
- Let it soak for a couple hours in sunshine
- Spray your next darker shade over the set layer
- Repeat with progressively deeper tones
I use separate spray bottles with a 2:1 water-to-dye ratio for even saturation. When I tried navy, then royal blue, then green, the depth was noticeable. The key? Skip rinsing between layers. Wait until your final color’s completely set. This prevents earlier shades from bleeding together, keeping your gradient crisp and deliberate.
Submerge Your Rug for Complete Color Saturation
While spray-layering creates beautiful gradients, there’s something satisfying about dunking your whole rug into a dye bath and watching the color bloom across every single fiber.
Full submersion gives you complete color saturation that’s difficult to achieve any other way. Here’s what works:
- Fill a large tank with enough dye liquid to completely cover your rug
- Use moderate heat and gentle agitation to help the dye penetrate deeper fibers
- Rinse thoroughly afterward to remove excess dye and prevent crocking
But here’s the thing—rug material compatibility matters significantly. Wool and cotton absorb color beautifully through submersion. Polyester and acrylic? They require different approaches.
After dunking, I press out excess water and lay everything flat to dry. It’s patient work, but watching that uniform color emerge is worthwhile.
Work Dye Deeper Into Fibers With a Rake

A carpet rake becomes your concealed weapon once you’ve applied dye to your rug. Here’s the thing: dye doesn’t magically know where to go. I learned this the hard way with my first attempt—patchy spots everywhere.
That’s where dye penetration works. While your dye’s still wet, grab that carpet rake and work it through multiple directions. You’re lifting fibers and pushing color from the surface straight into the core. Think of it like combing someone’s hair to expose the scalp.
This technique delivers even color distribution that looks professionally done. After raking thoroughly, let your rug dry completely before anyone walks on it. No shortcuts here—patience prevents smudging and locks in that uniform color you’re after.
Rinse Thoroughly to Remove Excess Dye

Once you’ve raked that dye through your rug and you’re happy with the color, it’s time for the part that actually matters—getting all that excess dye out.
Here’s your rinse plan:
- Grab your garden hose and use a gentle stream (seriously, skip the power-washer vibes that’ll trash your fibers)
- Work section by section so dye penetrates evenly and doesn’t pool on top like a puddle
- Keep going until the water runs clear—this prevents that awful bleeding onto your floors later
I learned this the hard way when my light-colored floor got tie-dye surprises. Not fun.
After rinsing, lay your rug outside overnight, then let the sun finish the job the next day. Once it’s dry, a rug pad underneath protects your floors and keeps everything in place.
Use a Rug Pad to Prevent Dye Transfer to Floors

Why do so many people skip the rug pad step and then panic when their beautiful new colors start bleeding onto their hardwood?
Why do so many people skip the rug pad step and then panic when their beautiful new colors start bleeding onto their hardwood?
I’ve learned this lesson the hard way. A quality rug pad sits between your freshly dyed rug and your floor, creating a protective barrier against dye transfer. It’s practical dyeing safety.
Here’s what makes it work:
- Prevents color bleeding when you step on or move your wet rug
- Protects your floors from permanent stains
- Reduces moisture damage during the drying process
Choose a pad slightly smaller than your rug—this prevents edges from catching moisture. If you’ve got velvet backing or sensitive floors, grab a latex-free option instead.
Spending a few dollars now beats refinishing floors later. Your future self will appreciate it.